Sometimes I get it sooo right. I think everything we did for this wedding turned out that way.
But some projects surpassed sooo right and went straight to perfection....
And from the requests for a 'how-to' on the photo charms, I guess you agree.
So I'm sharing. Because that's what this blog is all about. And because if I do I won't have to repeat it any more .... just point at this post and say - there it is! Oh, and also because its pretty simple...
I created these photo charms as a family tree. They are photos of parents, grandparents, aunts and uncles, etc. on their respective wedding days. They are the perfect keepsake. And they can be adapted to gifts, or ornaments, depending on the image you place inside.
You will need:
PHOTOS (digitalized) (that means they are scanned into your computer). I used wedding photos of the bride's family and groom's family - parents, grandparents, great-grandparents, aunts, uncles, brothers, sisters, etc.... But, you could also feature photos from their life, or photos of the bride and groom together. I really liked the family aspect of the old wedding photos - and it was so fun to see the wedding dresses from past decades. I had to scan them, sometimes crop them, and resize them to the 2x3 inch size I needed. I wanted the peoples faces to be large enough to see, but still wanted those vintage wedding dresses visible. I printed them in black and white, and added their names and the relationship to the bride/groom on the back- printed on cardstock or scrapbook paper.
(I think that was the hardest part.)
GLASS SLIDES 2"X3" (2 per charm) I purchased 2x3 glass slides for the charms. You can sometimes find the glass at craft stores [at around $4.50 for 4 slides], but it is so much cheaper if you get the microscope slides in bulk.
This box of 72 slides is under $8.00 plus shipping from Home Science Tools. You can get a gross (144) at Amazon for around $13.00 plus shipping. Combine it with your glue and tape for free shipping.
 |
If that seems like a lot of slides, you can purchase them for .35 cents a piece plus shipping from KLM BioScientific. You will need 2 per each charm.
( I might just add here that these make amazing gifts and Christmas ornaments - so maybe the 144 isn't too many after all.... :) )
( I might just add here that these make amazing gifts and Christmas ornaments - so maybe the 144 isn't too many after all.... :) )
DOUBLE SIDED SILVERED FOIL TAPE (1/4 INCH). This is used in stained glass work or soldering projects. Copper foil tape is more common, but this project doesn't require soldering skills, or solder for that matter. So we want the SILVER so it looks nice and shiny. Silver on both sides.
USArtQuest has it in 9ft rolls for $3.99. (Make sure you specify the silver)
Ameriglass Crafts has 108ft rolls for around $25.00
JEWELRY FINDINGS AND CHARMS - These will need a way to hang... so we will need to attach a bail, connector or a charm with a hole at the top to add a jump or split ring. You will glue it on - so make sure it is substantial enough to grab the glue. Basically, jump rings and charms on both ends - and beads or charms to dangle from the bottom.
Here are a few ideas. Amazon is a good source - I found these there:
These hearts could work both as a bail at the top, or a charm to dangle at the bottom.
 |
| how about hearts? |
There are glue on bails specifically made for the purpose of creating a way to hang a pendant.
 |
| cute little charm to dangle from the bottom more |
 |
| glue on silver bails here |
 |
| and here |
Or you can get a little creative and use a connector.
 |
| find it here |
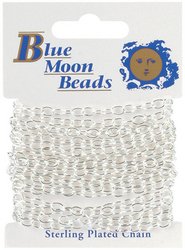
You can hang these with thin ribbon through the jump/split rings if they are large enough, or attach chain for hanging.
 |
| find it here |
GLUE - E6000 - It sticks anything to just about anything else. We are sticking metal jewelry findings to glass. Be generous without having glue oozing out the sides. Too little glue and they can pop off.
 |
| You can find it here |
TO ASSEMBLE:
Take two slides and sandwich a 2x3" photo and back piece between them. Using the silver foil tape, place the glass edges in the center of the tape and fold the edges of the tape over the glass. Try to keep equal amounts on each side so the border of silver will be even.
I like to start top center, because I know I'm putting a bezel there that will cover up the place where the tape begins and ends. Press firmly, and then use a popsicle stick to smooth the tape down.
Create your bezels and charms. Attach your rings to the charm you will use on the top. Do the same for the bottom, and add your little decorative dangle - bead or charm ...
Use a piece of sturdy cardboard or a tray you have lined with foil, and place the glass pieces face up. Using the E6000 glue, attach a charm, bail or connector with the hole at the top. Repeat at the bottom. Let this dry completely before touching again. (You can move them to a safe drying place if you have used the cardboard or tray.)
When they are completely dry (don't rush this part), you can add ribbon or chain to hang them with.
We tied ours onto a manzanita branch and added crystal garland and droplets.
Questions? Let me know! Good luck!


No comments:
Post a Comment